(click for more info.)
(click for more info.)
(click for more info.)
(click for more info.)
Blog posts
Use links above (click the images) for main articles.
-

Bringing Brewtools CAN sensors into Home Assistant
Brewtools’ density meter and agitator are excellent pieces of equipment, but they’re designed to talk to Brewtools’ own system over a private CAN bus. We wanted to use them directly in Home Assistant — so we built a small open-source bridge that does exactly that. The controller is built around an ESP32-C3 microcontroller and a…
-
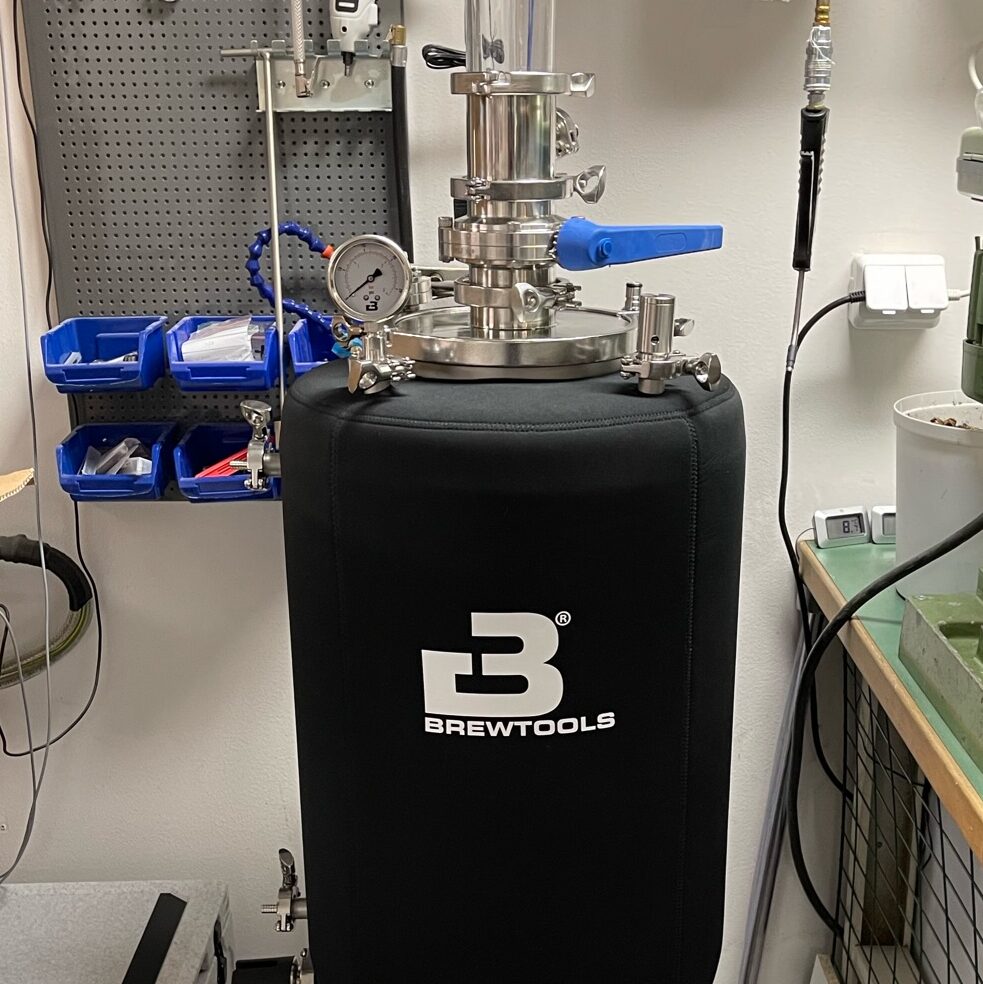
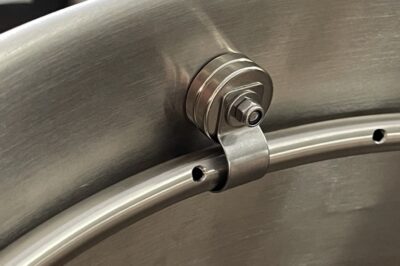
Sanitary pinch valves, updated design
Discover Our Redesigned Pinch Valves We’ve upgraded our original pneumatic pinch valves with a durable anodized aluminum body, offering enhanced longevity and effortless cleaning. Take a look at the original design here.
-
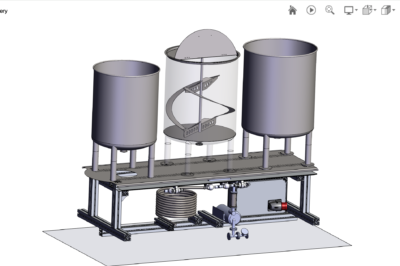
View our brewery in 3D
Not complete but you get the picture
-

Gammabrewery Showcases Innovative Brewing Solutions at Beer and Taste 2024
We’re excited to announce that Gammabrewery, in collaboration with Winterland Brewery and Lonitech AB, will be presenting our latest brewing innovations at Beer and Taste in Umeå (Nolia) on October 18-19, 2024! This is your chance to see firsthand how our cutting-edge equipment can enhance your brewing process—whether you’re a homebrewer looking to up your…
-
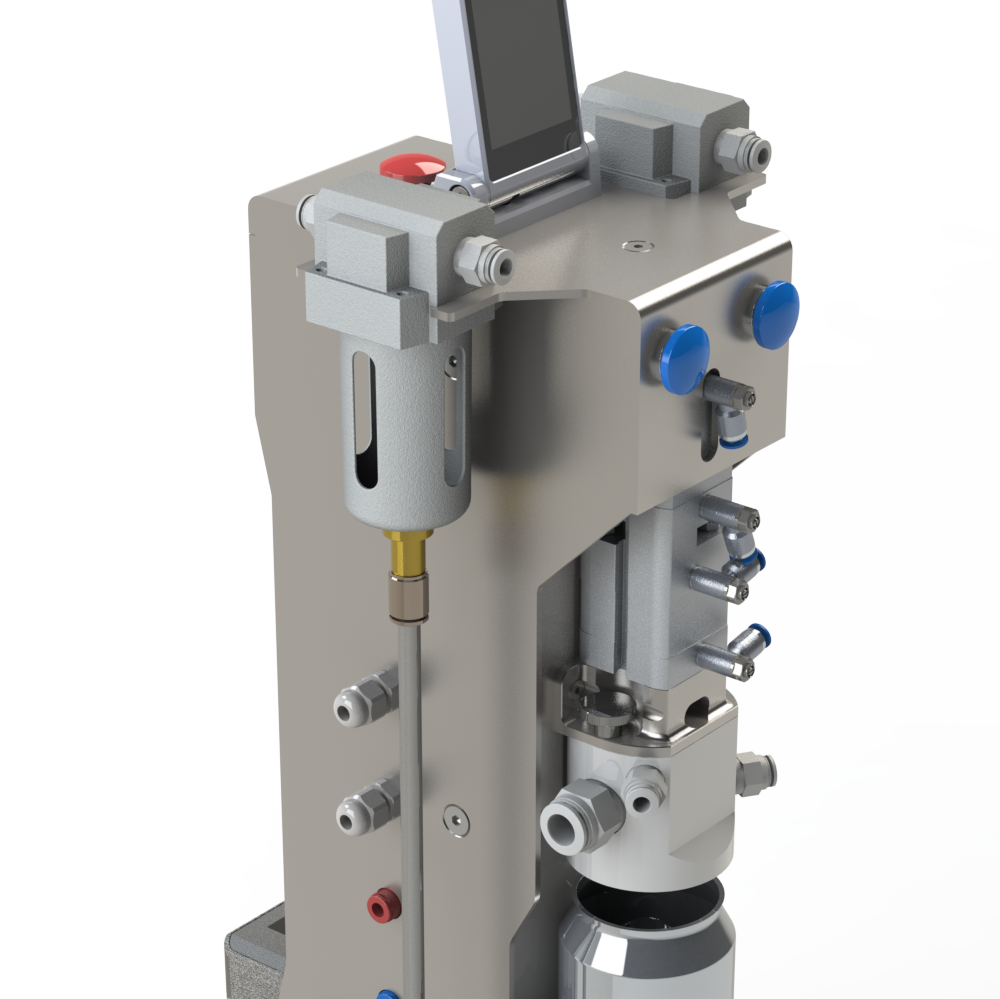
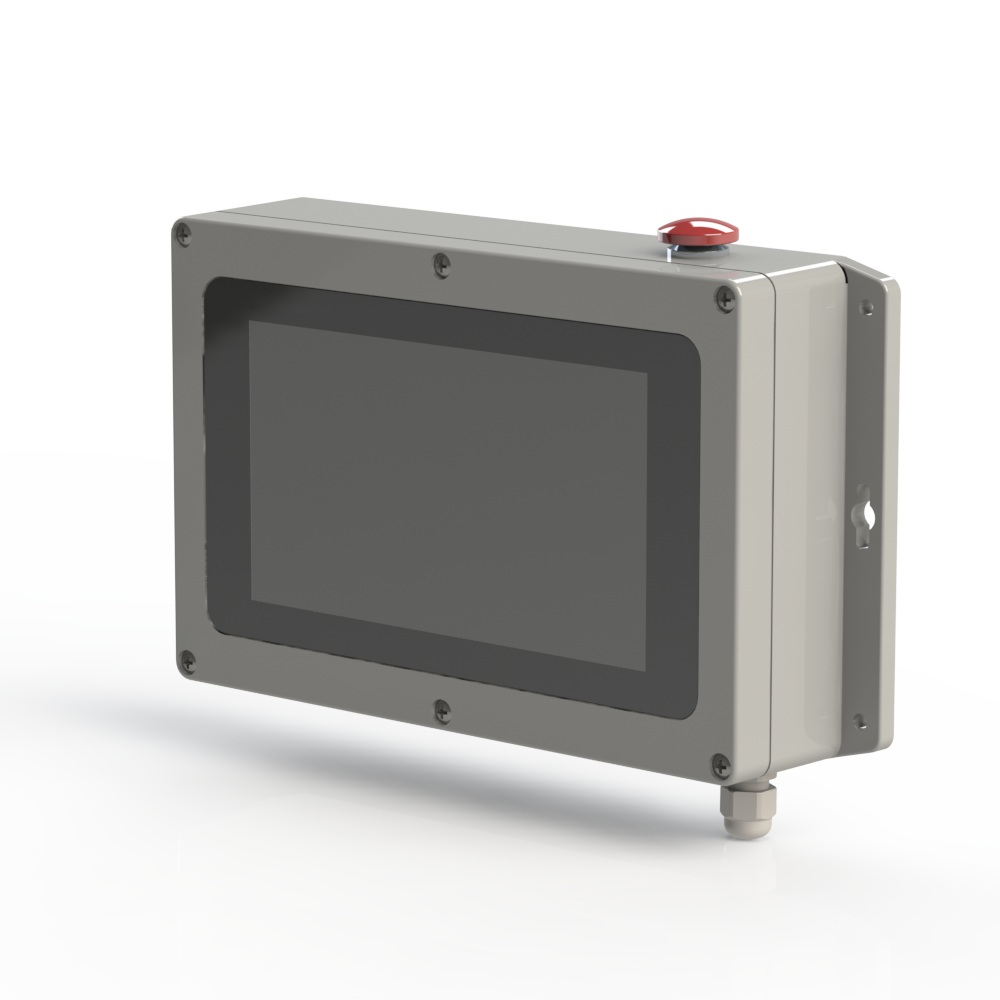
The LoniBrew controller is here!
Read all about it at the systems main page!
-
The LoDoFiller is here!
Something we have been working on for a long time! Check out the main page for the system!
-
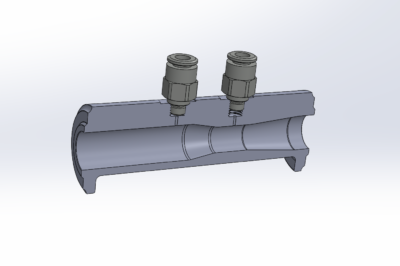
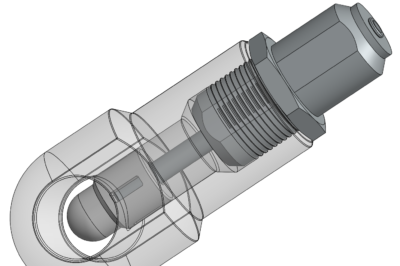
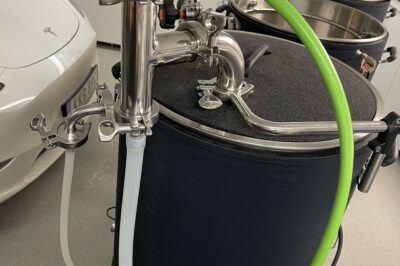
Venturi pipe for flow measurements
As we were going through the brewery’s hose system and replacing the sanitary valves, we also found the need to upgrade our flowmeter to a larger size. We started from the same theory as the previous version but made it more robust and, most importantly, designed it for higher flows. With the old venturi pipe,…
-
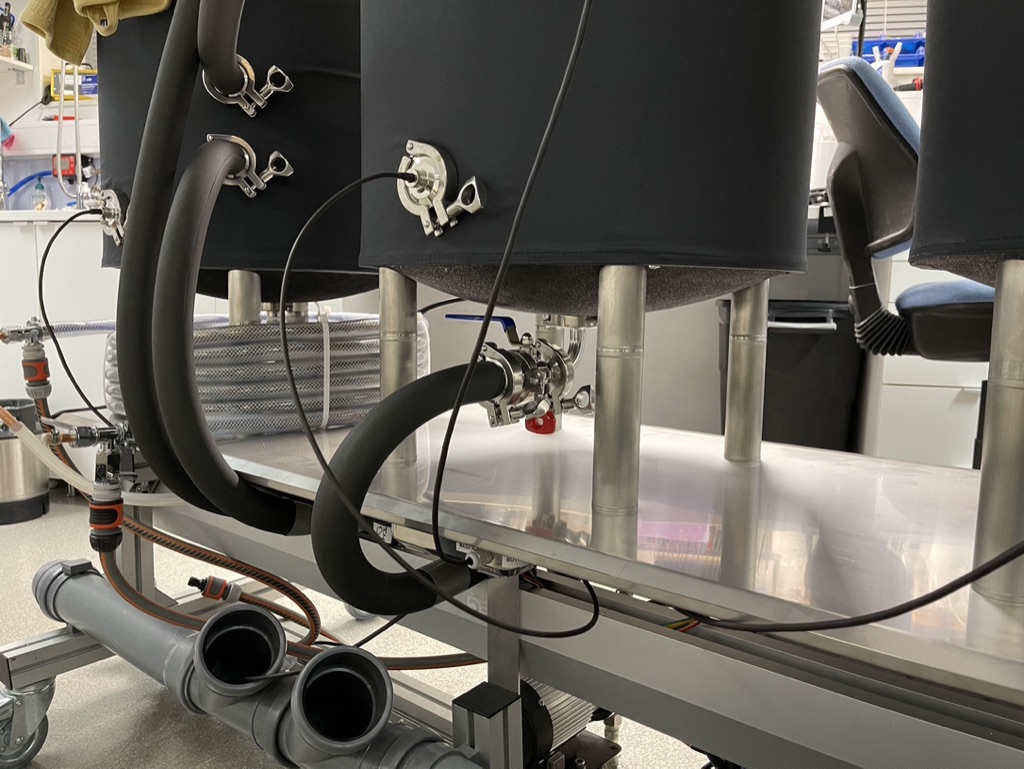
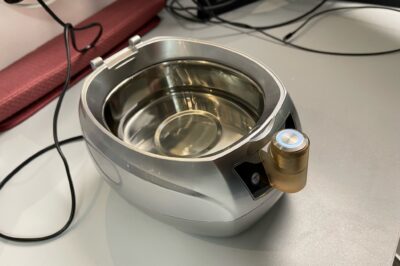
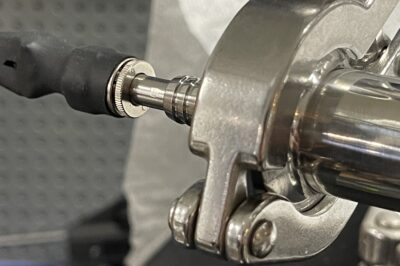
Pneumatic pinch valves
Due to our constant pursuit of enhancing our system, we began reevaluating hoses and flows within the brewing system. The design of the previous servo-pinch valves had dictated the placement of the valves and consequently the routing of all hoses within the system. Unfortunately, the valve placements often necessitated unnecessarily long hoses. During the optimization…
-
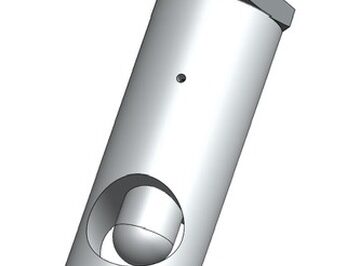
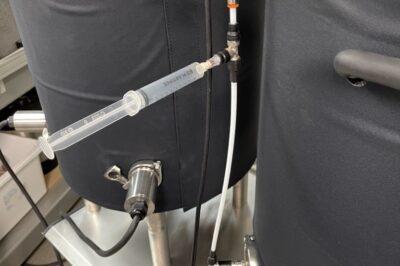
Cleaning adapter for the sample coil
We think that flushing the Brewtools sample coil after taking a sample is kind of messy and designed and printed this little accessory for it. It is printed in Formlabs Surgical Guide SLA resin that is kind of food grade and can handle the temperatures. CAD-files for printing your own adapter (NOTE not for commercial…
-

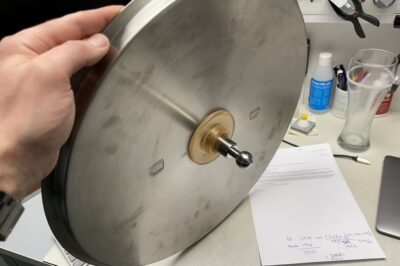
Volume sensor for the fermenter (from xxx)
Pending an NDA (non disclosure aggrement) with yyy.. can’t say more right now 😉
-

Grain conditioning experiments
At the beginning of our career as brewers (about 2 years ago) we experimented with conditioned grains to boost the efficiency of our brewery (which was really rubbish). In those days we used steam which we forced through the grains, this worked well for the efficiency of the brewery at the time but the process…
-
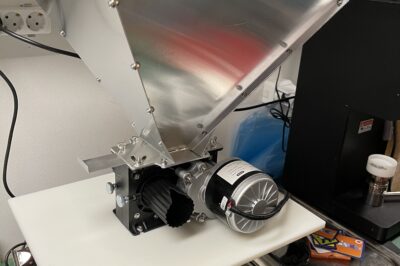
The NEW mill
Fell for the add on Facebook and ordered the KegLand MaltZilla Premium. Citing KegLand The MaltZilla Diamond Mill is quite a different mill design and it’s the first in the world to use diamonds impregnated into the surface of the roller. Most mills require aggressive knurling to push into the grain and “chop” the grain…
-
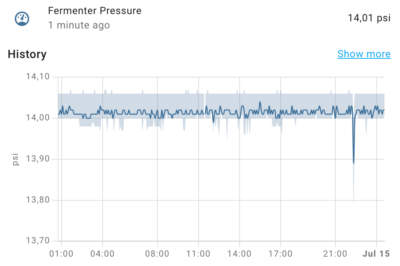
Electronic spunding valve
We have thought about building an electronic spunding valve for a while. We have measured pressure accurately and logged it to a db for a long time now but used a manual spunding valve. When planing for a brew we realized that the spunding would fall during a vacation out of town and that triggered…
-
Volume sensor for the fermenter (from weight)
The differential pressure based volume sensor is kind of tricky to use and have a lot of “moving parts” so we designed a volume sensor based on the fermenter weight instead. The scale is a standard bathroom scale capable of 180 kg that is stripped of all electronics except for the 4 pressure sensors that…
-
Volume sensor for the fermenter (from differential pressure)
Knowing the “exact” wort volume in a fermenter is “crucial” for quality control during the brewing process. However, measuring the volume accurately and continuously can be a challenge. At our brewery, we use differential pressure sensors for various measurement tasks, and we realized that this technology could also be used to estimate the wort volume…
-
Inline Filter Kit
We just had to have one 🙂
-
CIP-lid for the brewery
We use a CIP-ball for the fermenter and it works really great. We would like to use CIP on our kettles as well and we made this modification to a spare lid we had so that we could use the same CIP-ball for the brew kettles. The pump used is a submersible water pump (intended…
-
The LoniFiller (retired)
Inspired by the DuoFiller we designed our own dual can filler with automatic level sensors and purging. Please note that this filler is now replaced with The LoDoFiller! The level sensors is based on two digital pressure sensors, gas valves are just ordinary electromagnetic valves and the beer valves are the same pinch servo valves…
-
Foam booster
We do everything by the book and normally aim for about 2.4 volumes of CO2 i.e., use the pressure and time Brewfather sugests at our cold crash temperature. We also push our filler to the max and use no more than about 50 cm of 3/16″ tubing as reduction and fill our cans almost to…
-
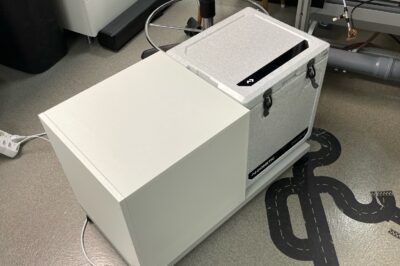
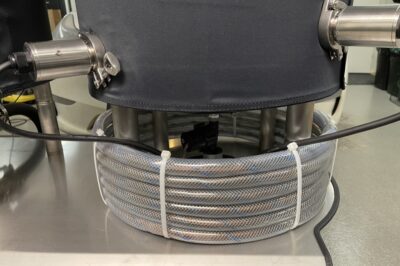
DIY glycol chiller and fermenter controller
When we invested in a Brewtools F80 fermenter we needed a glycol chiller for it. As usual we decided to make one instead of buying one. The nice thing is that we have total control over the system and we could crank the BTU/h up to 8000 without breaking the bank. Stripping the AC down…
-
Steam condenser
We do our brews in a garage, a large private garage but we do not want to destroy the ceiling so we have invested in a capable steam condenser for the boil kettle. It works really great!
-
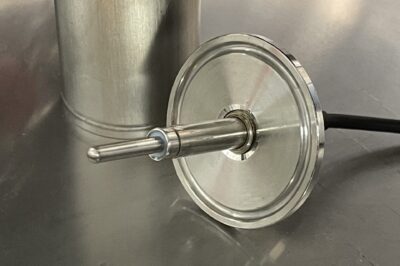
Digital pressure sensor for the fermenter
Everything we do is connected 🙂 The pressure sensor of the fermenter is no exception. We used the same typ of sensor as for the Venturi pipe and suction sensor but with a greater range (6 bar) and not differential.It is read from the fermenter controller, i.e., the RPi controlling the glycol chiller and other…
-
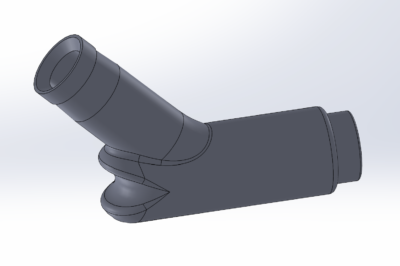
Sparge arm/mash manifold
We have used the “standard” sparge arm that is designed for the MLT but we wanted something that was more dynamic and gave room for stirring the bed if necessary so we designed a ring of 12 mm SS tubing with a quick connector tee that the mash inlet connects to. The ring is held…
-
Digital “suction” sensor
Many brewers use manometers or clear hoses at the bottom of the MLT to monitor the pressure below the grain bed. We have taken it to the next level and put a differential pressure sensor (1 psi range) between the bottom and top of the MLT to be able to digitally monitor and log the…
-
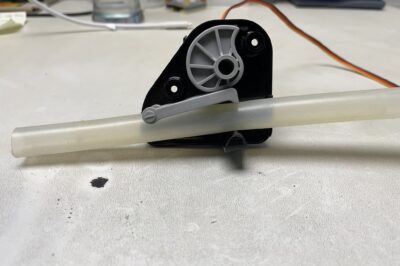
The servo valves (OLD)
These valves are now retired and replaced with Pneumatic pinch valves. About the only thing we salvaged from our first brewery, the Brewie B20, was the servo valves for 16×12 mm silicone hose. They are actually what makes our system so automated today. They pinch the hose to close and are therefor very sanitary and…
-
Temperature sensor system
We use six temperature sensors in the brewery for measuring the We use 1.5″ thermo wells for HLT, mash bottom and boil, and custom built sensor probes for mash inlet and outlet (after cooler).The reason for using custom probes is that the thermo wells ads latency to the measurement system that is not desirable for…
-
DIY Counterflow Cooler (old)
At first we used a plate heat exchanger but they are a pain to clean and not very effective so we made our own counterflow cooler out of 9 m of 12 mm copper tubing, some reinforced PVC hose and some pipe fittings. We wrapped grass trimmer cord around the pipe to delaminate the flow…
-
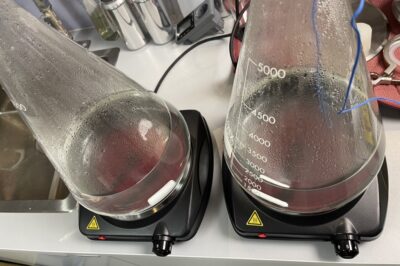
Pyrex Erlenmeyer flasks
After preparing starters in a kettle and the transfer hot wort to no-name Erlenmeyer flasks and then cool them in an ice bath we started to experiment with boiling DME in the flasks with direct heat (gas) which ended in disaster, we decided to go with some well known Pyrex Erlenmeyer flasks and halogen hobs…
-
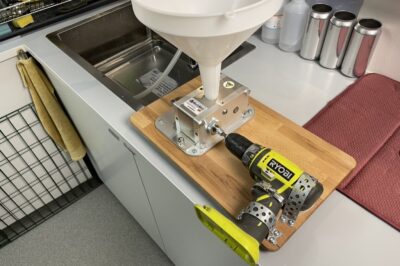
The OLD mill (sold)
Well, its a mill with a power drill attached, mounted on a cutting board from IKEA. It is very sturdy and it does a great job, not the fastest mill out there but perfect for us.
-

Venturi pipe for flow measurements (OLD)
This system is now updated with a bigger version! We started with a traditional flow sensor with an impeller but it was not accurate enough and was kind of invasive, especially when there was grains stuck in the impeller 🙂 Being physicists at trade we remembered something about differential pressure over a narrowing of a…
-
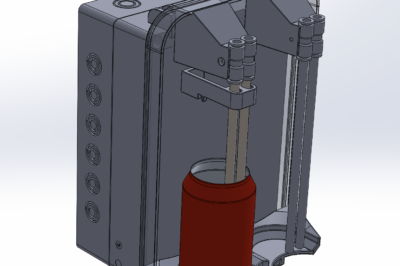
Can rinser
To sanitize and wash out any dirt from the cans befor filling them we designed this little can rinser with photo sensors for triggering the rinsing. The rinsing cycle is timed by an Arduino microprocessor. Works great!
-
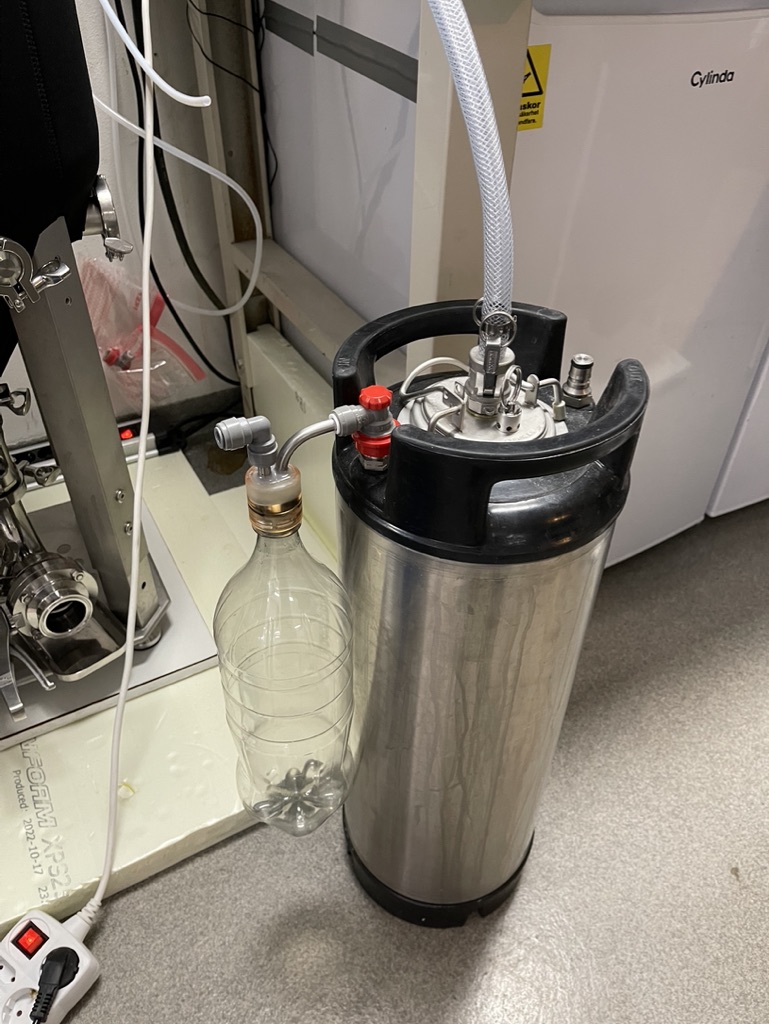
Krausen buffer
After a few mishaps with krausen finding its way up the hose to our spunding valve (with our former fermenter), this “krausen buffer” was designed to give a little more head room.The extra PET bottle is another layer of security in terms of volume, but not least so that we can see if the Cornelius…
-
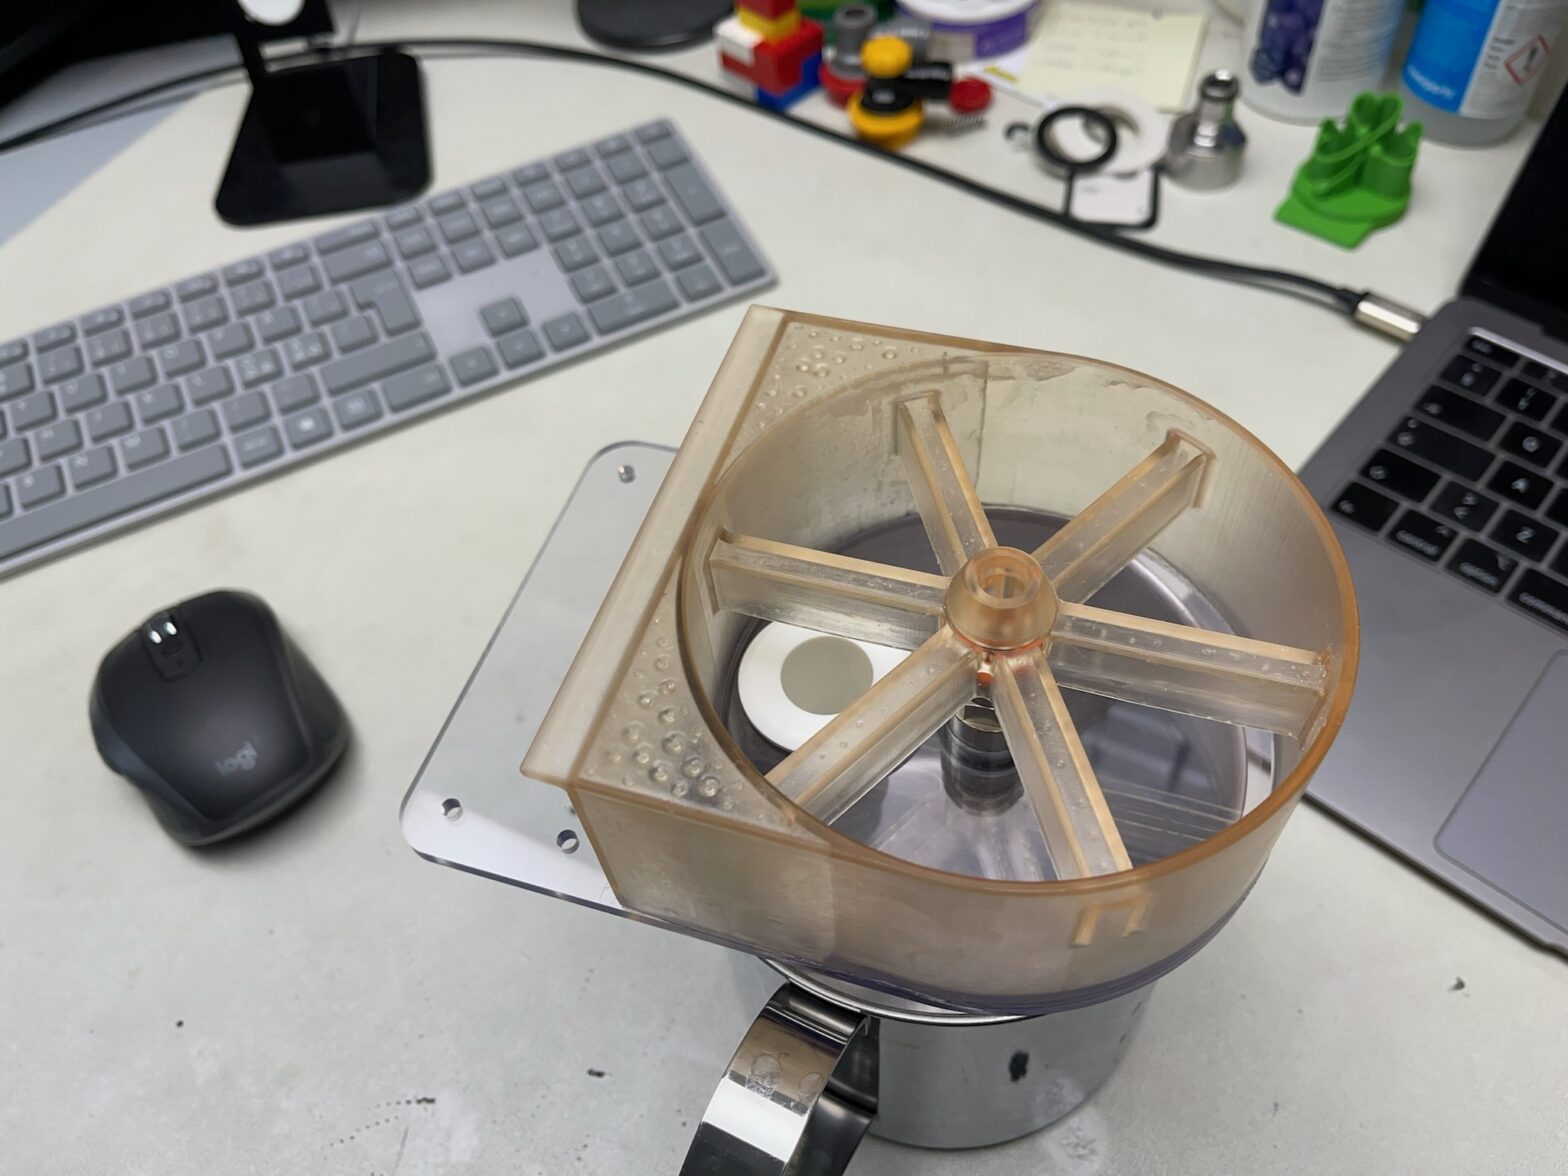
Magnetic stirrer for starters
Of course we need two magnetic stirrers for our nice Pyrex Erlenmeyer flasks to make starters in. And why buy them if you can build them for more money 🙂 Using a 120 mm computer fan, some 3D-CAD/printing, a voltage regulator and a suitable casing the following was produced. And they work great!
-
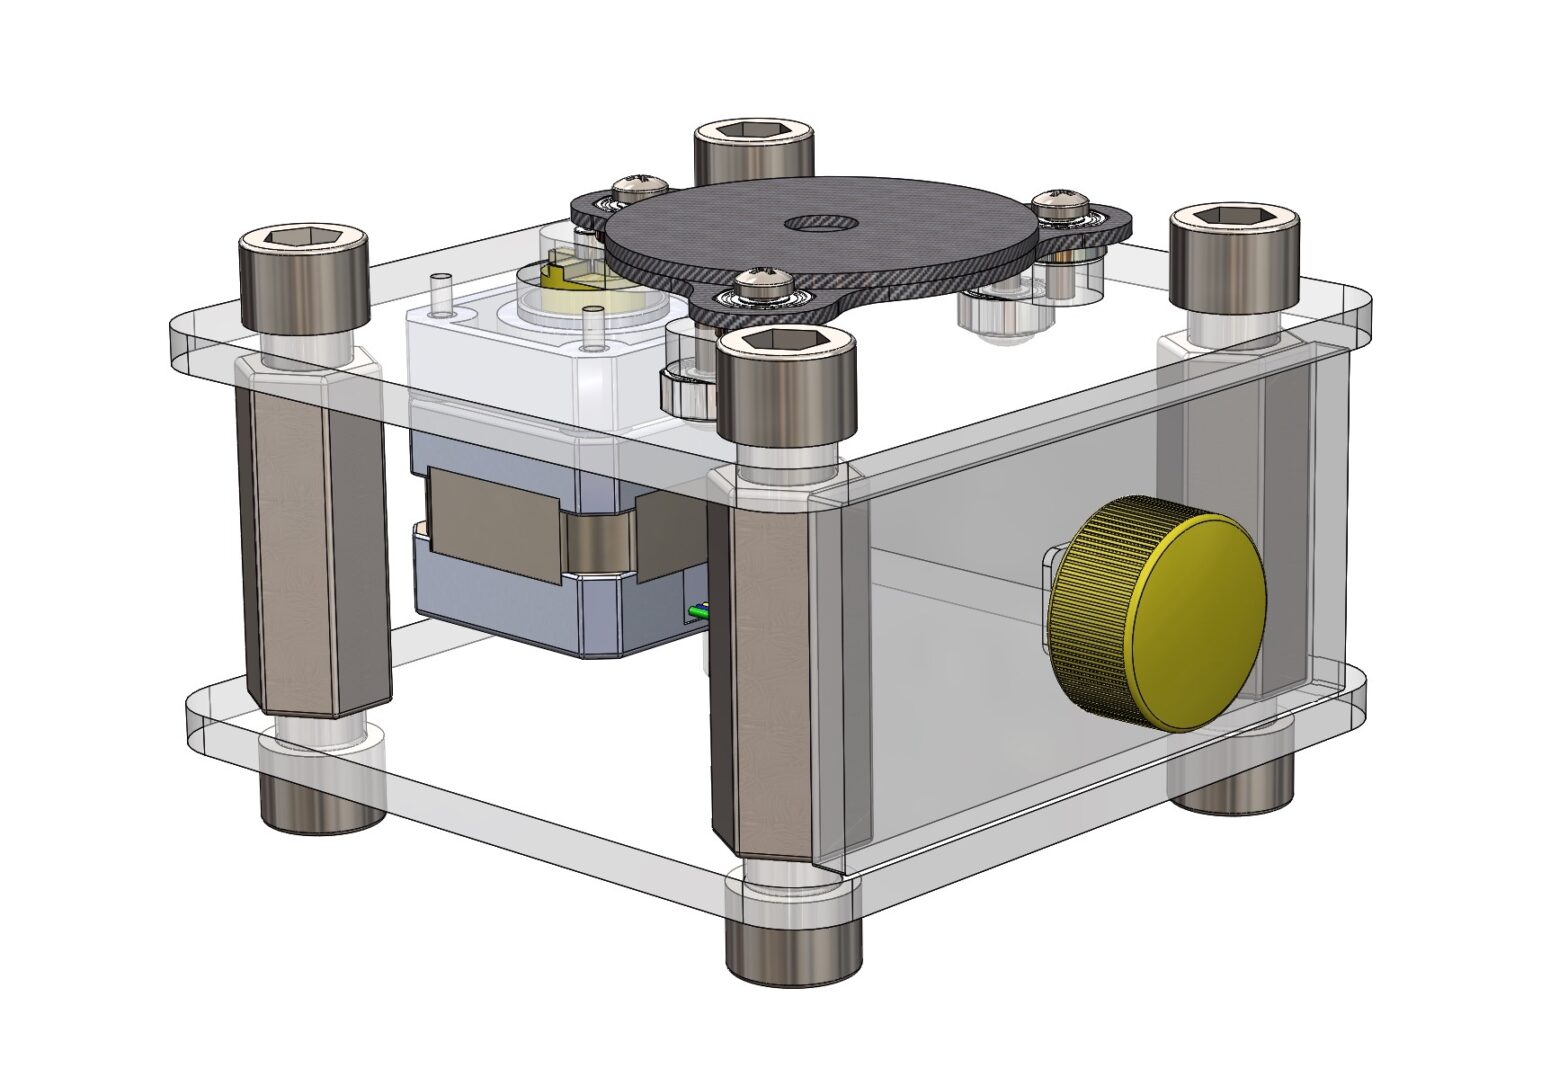
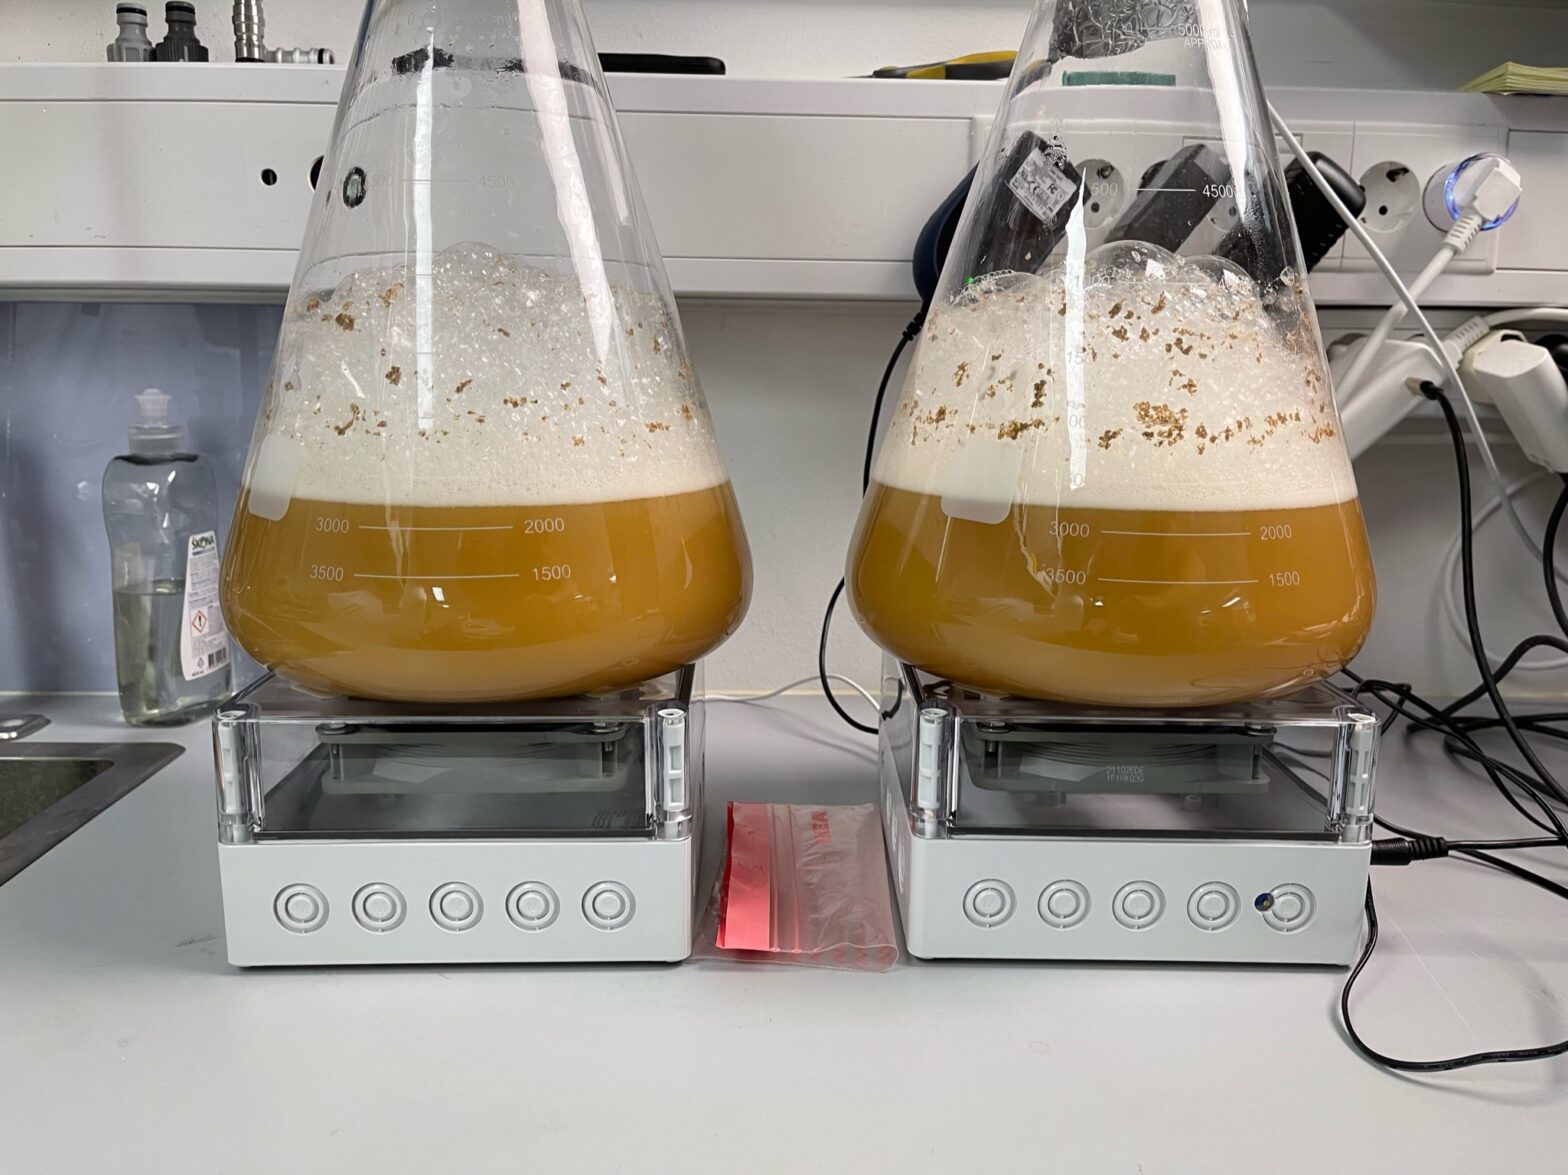
Orbital shaker for degassing SG samples
When we invested in an EasyDens SG meter we started to investigate the best way to degass samples for it and found many articles referencing orbital shakers. So, lets build one! Using a microcontroller (Arduino), a stepper driver board and a small stepper motor the following was produced with the help of 3D-CAD (Solidworks), a…
-
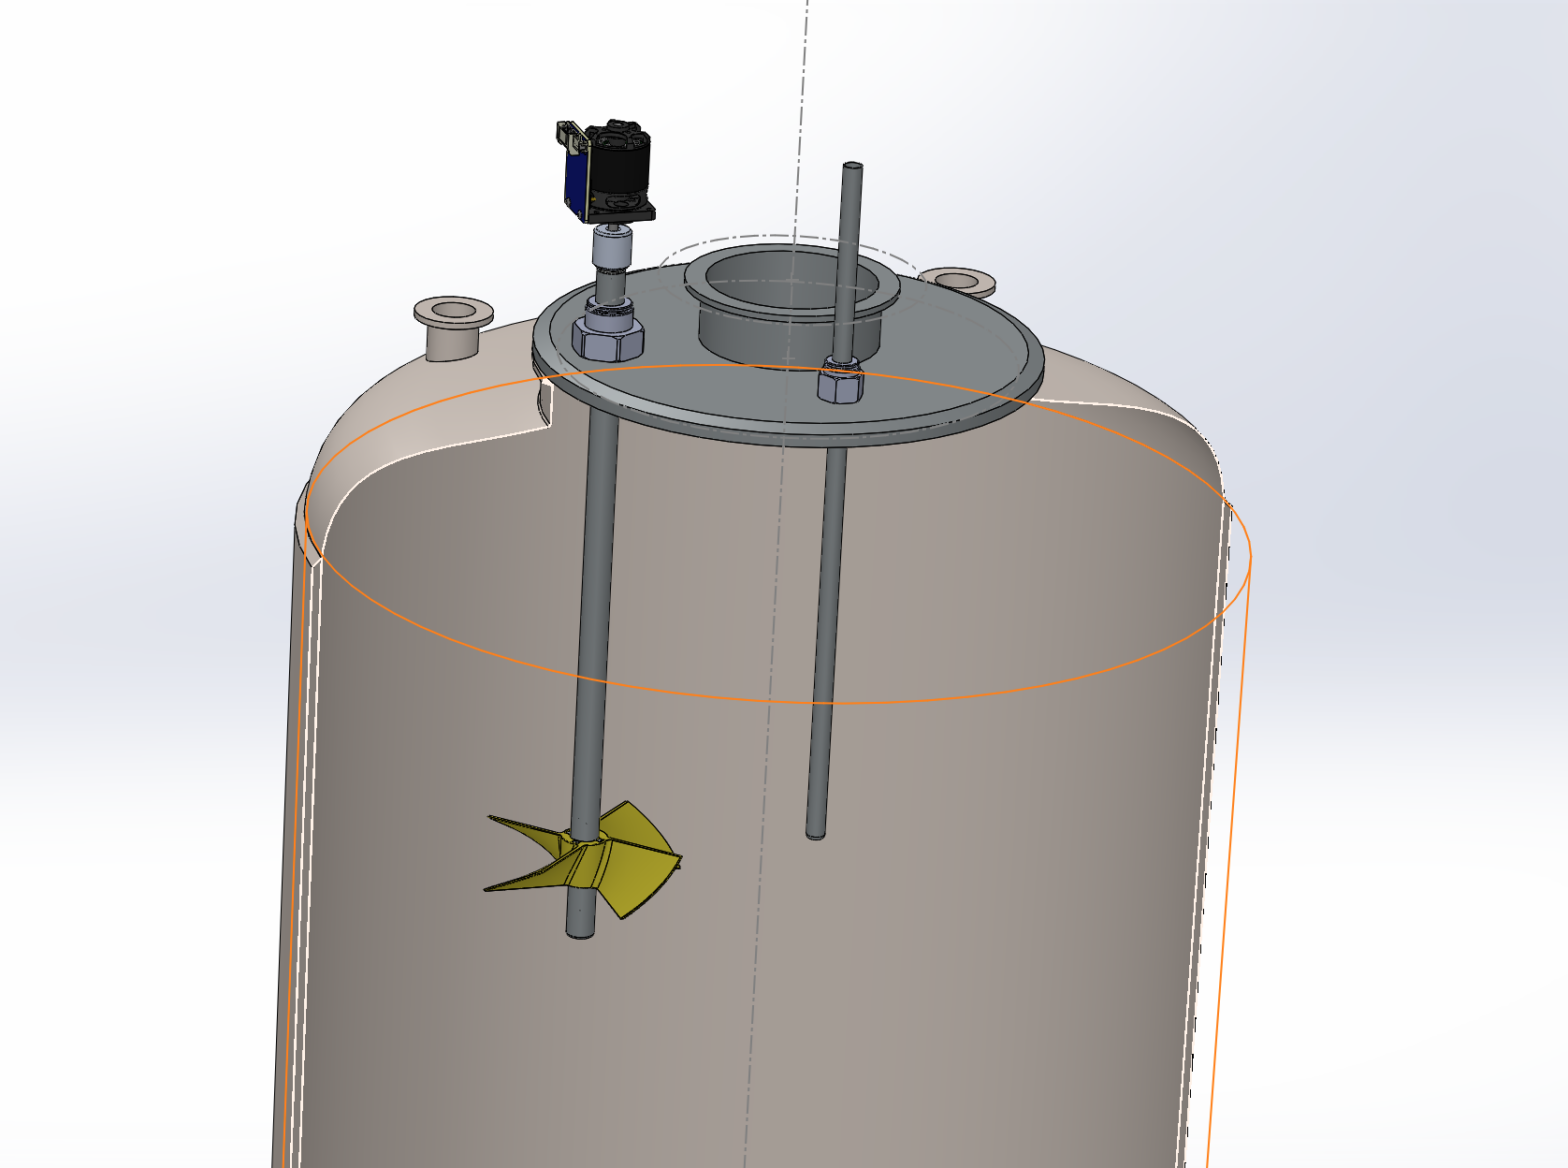
Suppressing temperature gradients in the fermenter
Due to the physical properties of liquids, especially water, there is a great gradient in temperature of the liquid in a partially cooled vessel that is not agitated. This can be seen if you drill a hole in the ice of a lake, you will (probably) find liquid water under the ice. Density of (liquid)…